Version Control with Git and GitHub
Welcome to the world of modern software collaboration! Today we’ll explore how Git and GitHub revolutionize the way developers work together.
Why Version Control?
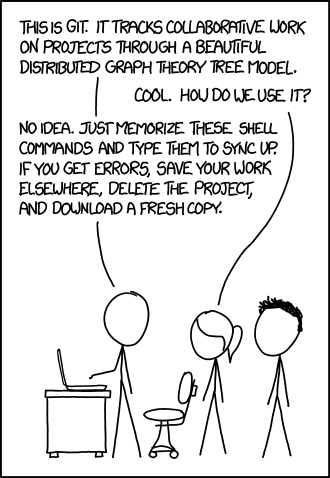
Figure 1:“If that doesn’t fix it, git.txt contains the phone number of a friend of mine who understands git. Just wait through a few minutes of ‘It’s really pretty simple, just think of branches as...’ and eventually you’ll learn the commands that will fix everything.” - XKCD
Before Version Control:
project_final.zipproject_final_v2.zipproject_final_REALLY_final.zipproject_final_use_this_one.zip
With Git:
Complete history of all changes
Multiple developers working simultaneously
Ability to experiment safely with branches
Easy rollback to any previous version
Detailed tracking of who changed what and when
Git vs GitHub: Understanding the Difference
Local Version Control System
Runs on your computer
Tracks file changes
Manages project history
Works offline
Command-line tool
Cloud-Based Git Hosting
Remote repository storage
Web-based interface
Collaboration features
Issue tracking
Project management tools
Git Fundamentals
The Three Trees of Git
Git organizes your work into three main areas, each serving a specific purpose in the version control workflow.
text-white
Your current project files
What it contains:
Modified files
New files
Deleted files
text-white
Prepared changes for commit
What it contains:
Files ready to be committed
Snapshot of selected changes
text-white
Permanent project history
What it contains:
All committed changes
Complete project timeline
Branch information
Essential Git Commands
Table 1:Git Command Reference
Command | Purpose | Example | When to Use |
|---|---|---|---|
| Initialize repository |
| Starting a new project |
| Copy remote repository |
| Working on existing project |
| Stage changes |
| Before committing changes |
| Save changes permanently |
| After staging changes |
| Upload to remote |
| Sharing your work |
| Download from remote |
| Getting latest changes |
Hands-On Exercise: Your First Repository
:class: important
Follow along as we create your first Git repository. Open your terminal and let’s go!
### Step 1: Initial Setup

```{code-block} bash
:caption: Configure Git (do this once per computer)
:linenos:

# Set your identity
git config --global user.name "Your Name"
git config --global user.email "your.email@example.com"

# Check your configuration
git config --list:class: tip
Use the same email address you’ll use for GitHub to link your commits to your GitHub profile!
### Step 2: Create Your First Repository

```{code-block} bash
:caption: Initialize a new repository
:linenos:
:emphasize-lines: 3,6

# Create a new directory
mkdir my-first-repo
cd my-first-repo

# Initialize Git repository
git init

# Check status
git status
Expected Output
$ git init
Initialized empty Git repository in /path/to/my-first-repo/.git/

$ git status
On branch main

No commits yet

nothing to commit (create/copy files and use "git add" to track)
Step 3: Add and Commit Files
1 2 3 4 5 6 7 8 9 10 11 12 13 14 15# Create a README file echo "# My First Repository" > README.md echo "This is my introduction to Git!" >> README.md # Check what changed git status # Stage the file git add README.md # Check status again git status # Commit the changes git commit -m "Initial commit: Add README"
Create and track your first file
🌿 Understanding Branches
Branching Workflow Visualization
Common Branching Commands
# Create a new branch
git branch feature/new-feature

# Switch to the branch
git checkout feature/new-feature

# Create and switch in one command
git checkout -b feature/another-feature

# List all branches
git branch
Branch creation and switching
# Make changes to files
echo "New feature code" > feature.txt

# Stage and commit
git add feature.txt
git commit -m "Add new feature"

# Switch back to main
git checkout main

# Merge the feature branch
git merge feature/new-feature
Making changes on branches
# Delete a merged branch (local)
git branch -d feature/new-feature

# Force delete a branch (be careful!)
git branch -D feature/unwanted-feature

# Delete remote branch
git push origin --delete feature/old-feature
Branch maintenance
🐙 GitHub: Collaboration Supercharged
Repository Features
text-white
Bug tracking
Feature requests
Project boards
Milestone planning
## Bug Report

**Description:** Brief description of the bug

**Steps to Reproduce:**
1. Go to '...'
2. Click on '....'
3. See error

**Expected behavior:** What should happen
**Actual behavior:** What actually happens
Sample Issue Template
text-white
Code review process
Discussion threads
Automated testing
Merge management
## Changes Made
- [ ] Added login functionality
- [ ] Updated documentation
- [ ] Added unit tests

## Testing
- All tests pass ✅
- Manual testing completed ✅
Sample PR Template
GitHub Workflow Exercise
Add a README file with your name and course information
Push your changes:
git add README.md
git commit -m "Add personal README"
git push origin main
## 🤝 Collaboration Workflows

### The GitHub Flow

```{mermaid}
graph TD
    A[Create Branch] --> B[Make Changes]
    B --> C[Create Pull Request]
    C --> D[Code Review]
    D --> E{Approved?}
    E -->|Yes| F[Merge to Main]
    E -->|No| B
    F --> G[Deploy]

    style A fill:#e1f5fe
    style F fill:#c8e6c9
    style G fill:#fff3e0
Best Practices for Collaboration
Commit Message Best Practices
Good commit messages are:
type(scope): short description

Longer description explaining the change
and why it was necessary.

- Bullet points for multiple changes
- Reference issues: Fixes #123
Commit Message Format
Examples:
feat(auth): add user login functionality

fix(api): resolve null pointer exception in user service

docs(readme): update installation instructions

test(auth): add unit tests for login validation
Good Commit Messages
Pull Request Workflow
Step-by-Step PR Process:
Create a feature branch:
git checkout -b feature/user-authenticationMake your changes and commit:
git add .
git commit -m "feat(auth): implement user login system"
Push to GitHub:
git push origin feature/user-authenticationCreate Pull Request on GitHub
Request reviewers
Address feedback
Merge when approved
🚨 Common Git Scenarios & Solutions
Example conflict:
<<<<<<< HEAD
function greet() {
    return "Hello World!";
}
=======
function greet() {
    return "Hi there!";
}
>>>>>>> feature-branch
Merge conflict in code
Resolution steps:
Open the conflicted file
Choose which version to keep (or combine them)
Remove conflict markers (
<<<<<<<,=======,>>>>>>>)Add and commit the resolved file
# Undo changes in working directory
git checkout -- filename.txt

# Unstage a file
git reset HEAD filename.txt

# Undo last commit (keep changes)
git reset --soft HEAD~1

# Undo last commit (discard changes)
git reset --hard HEAD~1

# Create a new commit that undoes changes
git revert HEAD
Common undo operations
# View commit history
git log

# View compact history
git log --oneline

# View graphical history
git log --graph --all --oneline

# View changes in a commit
git show <commit-hash>

# View file history
git log --follow filename.txt
Exploring project history
Interactive Quiz
Quiz Answers
Answer 1: B) git checkout -- filename - This discards uncommitted changes in the working directory.
Answer 2: A) git status - Shows the status of files in working directory and staging area.
Answer 3: D) All approaches can work, but the choice depends on your team’s workflow preferences:
git merge maincreates a merge commitgit rebase mainreplays your commits on top of maingit pull origin maingets latest changes first
Advanced GitHub Features
GitHub Actions (CI/CD Preview)
1 2 3 4 5 6 7 8 9 10 11 12 13 14 15 16 17 18 19name: Test and Deploy on: push: branches: [ main ] pull_request: branches: [ main ] jobs: test: runs-on: ubuntu-latest steps: - uses: actions/checkout@v2 - name: Setup Node.js uses: actions/setup-node@v2 with: node-version: '16' - run: npm install - run: npm test
Simple GitHub Actions workflow
Project Management with GitHub
GitHub Project Features
Feature | Purpose | Best For |
|---|---|---|
Issues | Track bugs and features | Task management |
Projects | Kanban-style boards | Sprint planning |
Milestones | Group related issues | Release planning |
Discussions | Community conversations | Q&A and brainstorming |
Practice Challenges
📚 Resources & Next Steps
Essential Resources
Cheat Sheets
📄 Git Command Cheat Sheet
Repository Setup:
git init                    # Initialize repository
git clone <url>            # Clone remote repository
Basic Workflow:
git status                 # Check status
git add <file>            # Stage file
git add .                 # Stage all files
git commit -m "message"   # Commit changes
git push origin main      # Push to remote
git pull origin main      # Pull from remote
Branching:
git branch                # List branches
git branch <name>         # Create branch
git checkout <name>       # Switch branch
git checkout -b <name>    # Create and switch
git merge <branch>        # Merge branch
git branch -d <name>      # Delete branch
## **Key Takeaways**

```{admonition} 🏁 What You've Learned Today
:class: success

✅ **Version Control Fundamentals**
- Why version control is essential for software development
- The difference between Git and GitHub

✅ **Git Basics**
- Essential Git commands and workflows
- The three trees: Working Directory, Staging Area, Repository

✅ **Branching Strategies**
- How to create, switch, and merge branches
- Best practices for branch naming and management

✅ **GitHub Collaboration**
- Pull Request workflow
- Code review process
- Project management features

✅ **Real-World Skills**
- Handling merge conflicts
- Writing good commit messages
- Using GitHub for team collaboration
🔜 Coming Up Next
In our next lecture, we’ll explore the Software Development Life Cycle (SDLC) and see how version control fits into the bigger picture of software engineering processes.
“Git is not just a tool, it’s a way of thinking about collaboration and code evolution.”